 Complete VR Studio
Home › Guides › RayNeo blurry edges
How to reduce blurry edges on RayNeo glasses
XR glasses like the RayNeo Air series project a large virtual screen through compact optics. Many owners notice that text looks crisp in the middle but softer toward the edges and corners. Some of that softness comes from the optics themselves, and no software can remove it completely. A lot of it, though, comes from things you can change: how the glasses sit on your face, small differences between your left and right eye, and how the picture is scaled. This guide walks through a practical RayNeo Air 3 blurry edges fix, first with general tips that need no software, then with per-eye calibration in Complete VR Studio.
Step 1: Fix the physical fit first
Before touching any settings, rule out the simple causes. Software adjustments work best on a stable, well-fitted picture.
- Nose pads and height. Try the different nose pad sizes and positions. If the glasses sit too high or too low, one edge of the screen usually goes soft first.
- Distance and angle. Slide the glasses slightly closer to or farther from your eyes, and tilt them a little. Small changes can move the sharp zone noticeably.
- Clean lenses. Smudges on the outer or inner lenses blur everything. Clean them with a microfiber cloth.
- Prescription. If you normally wear glasses, uncorrected vision will make the whole image soft. Use the correct prescription inserts if your model supports them.
Step 2: Set a clean baseline
Start from a neutral picture so you can tell what each change does.
- Run your PC output at the glasses' native resolution and refresh rate. Scaled resolutions add softness of their own.
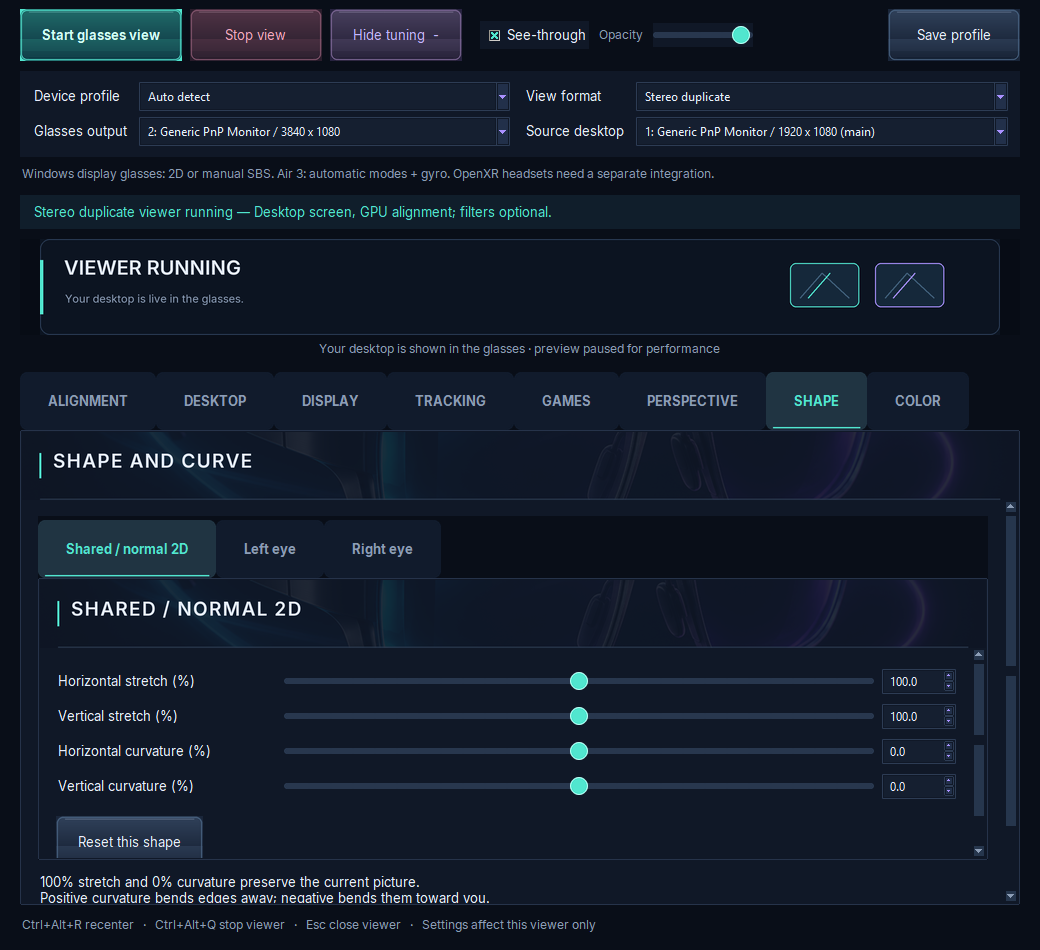
- In Complete VR Studio, open Shape and press Reset this shape. 100% stretch and 0% curvature keep the current picture unchanged.
- In Perspective, press Reset shared tilt so pitch, yaw and roll start at 0.
Step 3: Align each eye with stereo calibration
If your two eyes see slightly offset images, your brain has to work harder to merge them, and edges often look doubled or soft. That's why per-eye calibration matters.
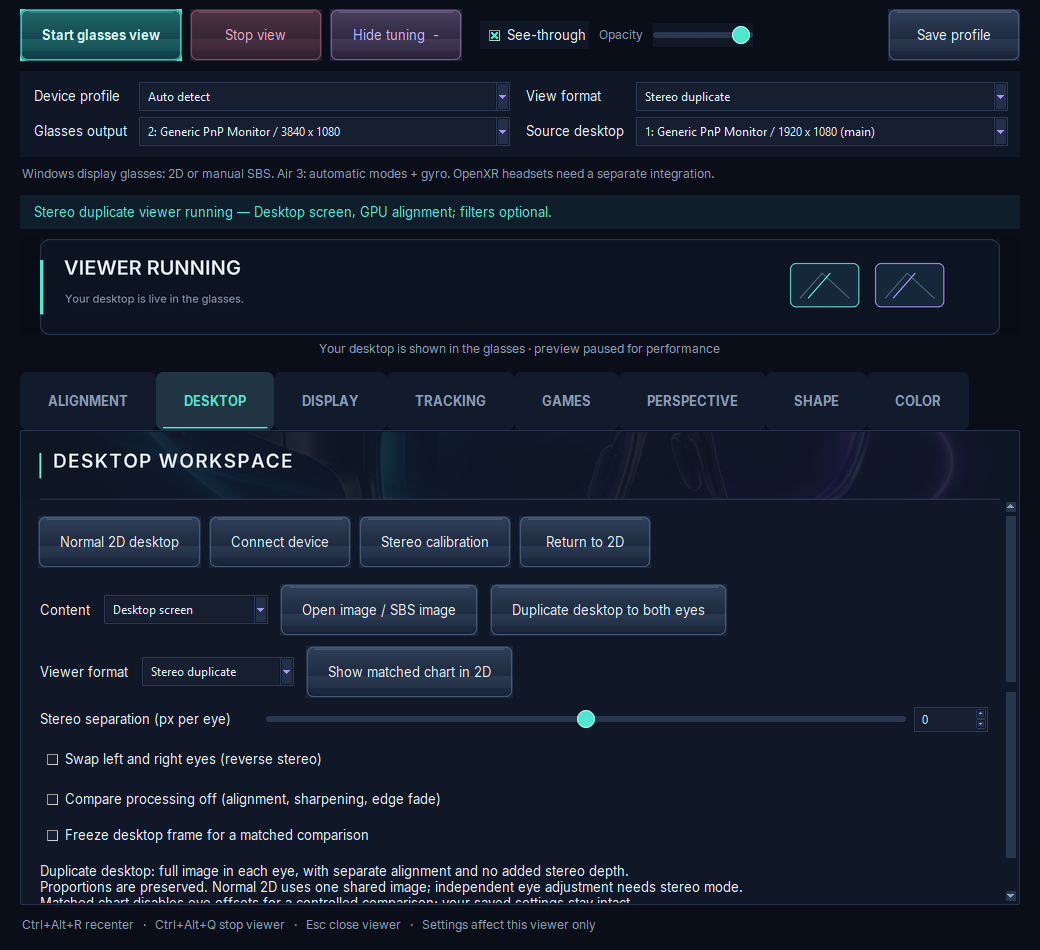
- Connect your glasses and switch to a stereo view. In Complete VR Studio, independent eye adjustment needs stereo mode.
- Use Stereo calibration and Show matched chart to get a steady reference image.
- In Alignment, nudge the left and right eye separately until the chart fuses into one clean image with no doubling at the edges. In duplicated mode, eye alignment also gives you separate pitch and yaw and fine roll for each eye.
- Take your time and rest your eyes between adjustments. Small steps work better than big jumps.
Step 4: Fine-tune stretch and curvature per eye
Once both eyes line up, use per-eye stretch and curvature to shape the picture so important content sits inside the sharpest part of your view.
- Stretch slightly below 100% pulls the picture edges inward, away from the softest outer zone. This shrinks the usable picture a little, so find a balance you like.
- Curvature bends the picture edges: positive values bend them away from you, negative values toward you. Try small values in each direction and watch the corners.
- Use the Left eye and Right eye tabs if one side looks worse in one eye only.
Step 5: Add sharpening and edge fade carefully
Sharpening and edge fade are under the Display tab.
- Raise sharpening in small steps. Too much sharpening creates halos around text, which can look worse than mild softness.
- Edge fade softens the transition at the outer border, so the softest region draws less attention.
- To judge a change fairly, use Freeze desktop frame and Compare processing off in the Desktop tab. This switches alignment, sharpening and edge fade off and on over the same frame.
General tips for a sharper picture
- Use larger text or Windows display scaling for reading-heavy work, so small text stays in the center of the view.
- Keep important windows near the middle of the virtual screen rather than in the corners.
- Press Ctrl+Alt+R to recenter the view if it drifts.
- If you change nose pads or glasses position, check your eye alignment again.
What's included in the trial
Per-eye and shared stretch/curvature, perspective/tilt and color controls are premium features. They're included in the 7-day trial that starts at install. Basic desktop viewing and eye alignment stay available until day 90. See trial & pricing and compatibility for details.